Shopify Integration
Ensure Your Shopify Plan Meets Requirements
Before beginning the integration process, it’s crucial to ensure that your Shopify account is on the Grow, Advanced or Plus plan. This requirement is due to the need to send identifying information (such as emails and phone numbers) to Hyros with each sale, which is NOT available on the Basic
plan.
Why is this important?
The Shopify plan and above provide enhanced API access, allowing for the transmission of essential customer data alongside sales information. This level of detail is necessary for Hyros to track your
sales accurately and provide the insights you need to optimize your store’s performance.
How to check your plan
Log into your Shopify admin, click on ‘Settings,’ and then ‘Plan and permissions.’ Here, you can see
your current plan and upgrade if necessary.
For a reference to all available Shopify plans and to choose the one that best fits your business
needs, visit Shopify Pricing.
Note:: Once you have confirmed or upgraded to the appropriate Shopify plan, proceed with the integration steps outlined in this guide to set up your store with Hyros.
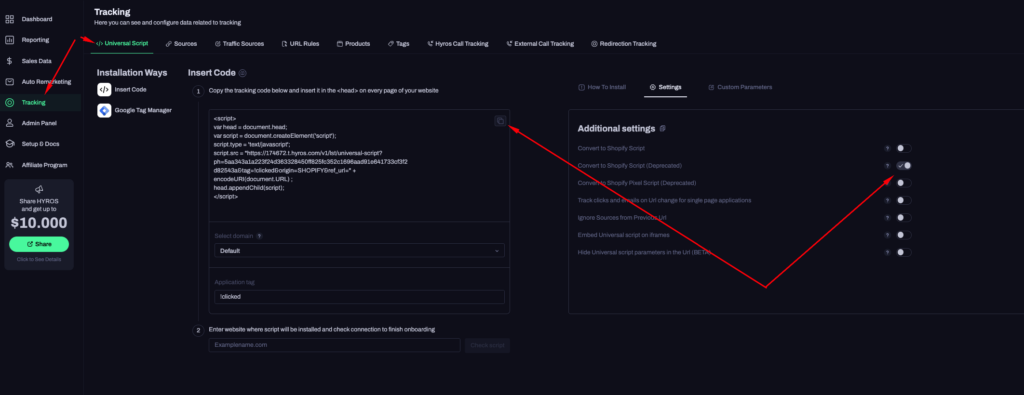
Step 1 – Install Universal Script
Additionally, you will need to copy this Universal script and paste it in theme.liquid file from Shopify.

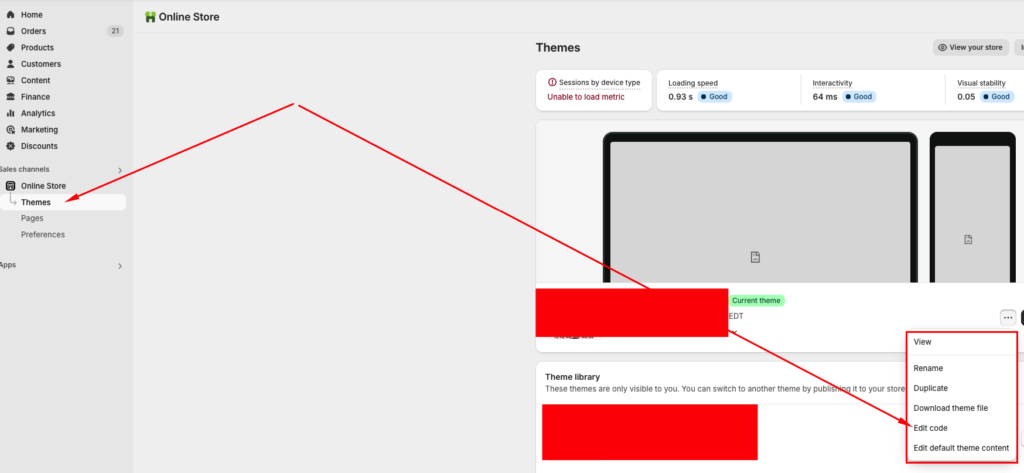
To access theme.liquid file access this section below:

Here, paste the universal script between the <head></head> tags

Step 2 – Integrate with Shopify
Use our integration HERE to integrate your store.
Important Update 1
In the video above at min 0:36, we need to include two additional events, such as: write_discounts and read_discounts
Important Update 2
Your Store URL in the above configuration can be found here Settings->Domains.
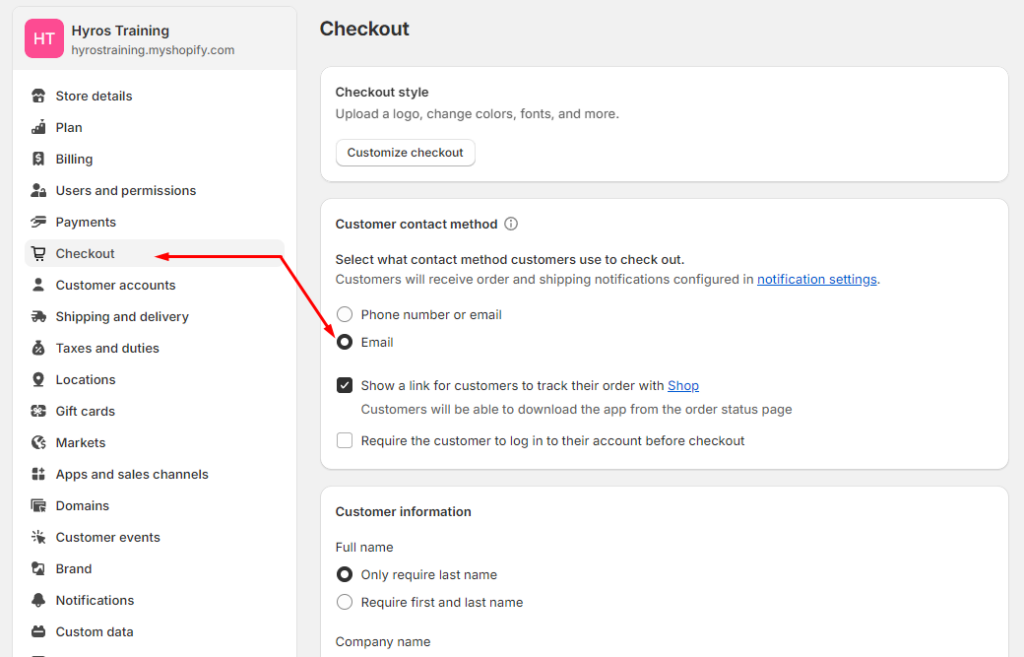
Step 3 – Enable Email as Contact Method
Go to SETTINGS at the bottom of your Shopify dashboard left sidebar menu. Ensure that the Email field at checkout is enabled. If a user does not enter an email we won’t be able to track the sale.

Click SAVE in the top right hand corner.
This concludes the setup.
Note:: If you have any of the following extra add-ons with Shopify please see the specific guide for that add-on to ensure tracking is setup correctly:
BetterCart
Intrecart
Pagefly Pages
Recharge Checkout
Product Recommendation Quizzes
Paypal
Zipify Pages
Optional Step
Sales Mapping using Shopify
Adding Shopify Store Name to Product Tag
Filter Shopify Sales by specific channel
Can I import previous data (from before I started using Hyros)?
Enable/Disable Lead processing