Drip
Step 1 – Setup UTM Tracking in Drip
Following Drips’s documentation, setup your default campaign parameters in the UTM tracking settings.
Specifically for the purposes of Hyros tracking, it’s recommended to do the following: go to Settings -> Email Setup -> Google Analytics.
Make sure you have drip as the name inside the Source field and that you have Campaign Name selected from the dropdown list, exactly as shown below:
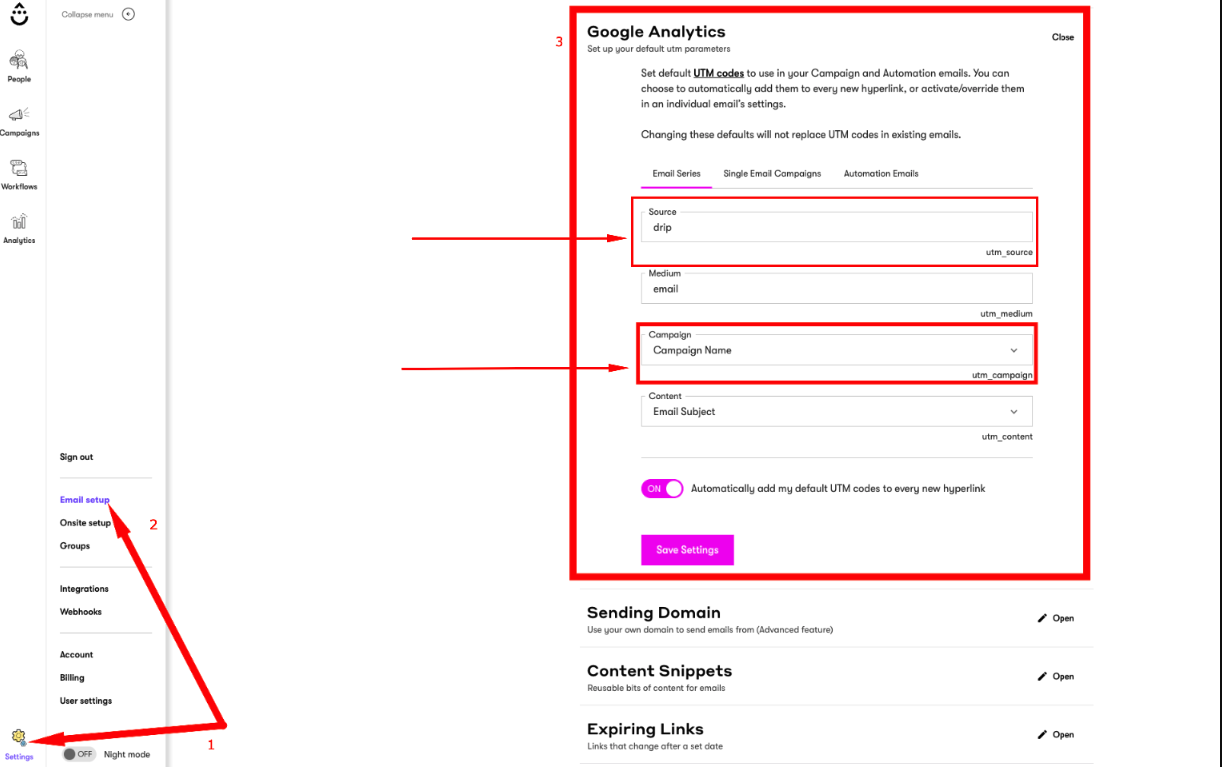
This will add these UTMs to all of your campaigns and flows by default.
Step 2 – Add a URL rule inside Hyros
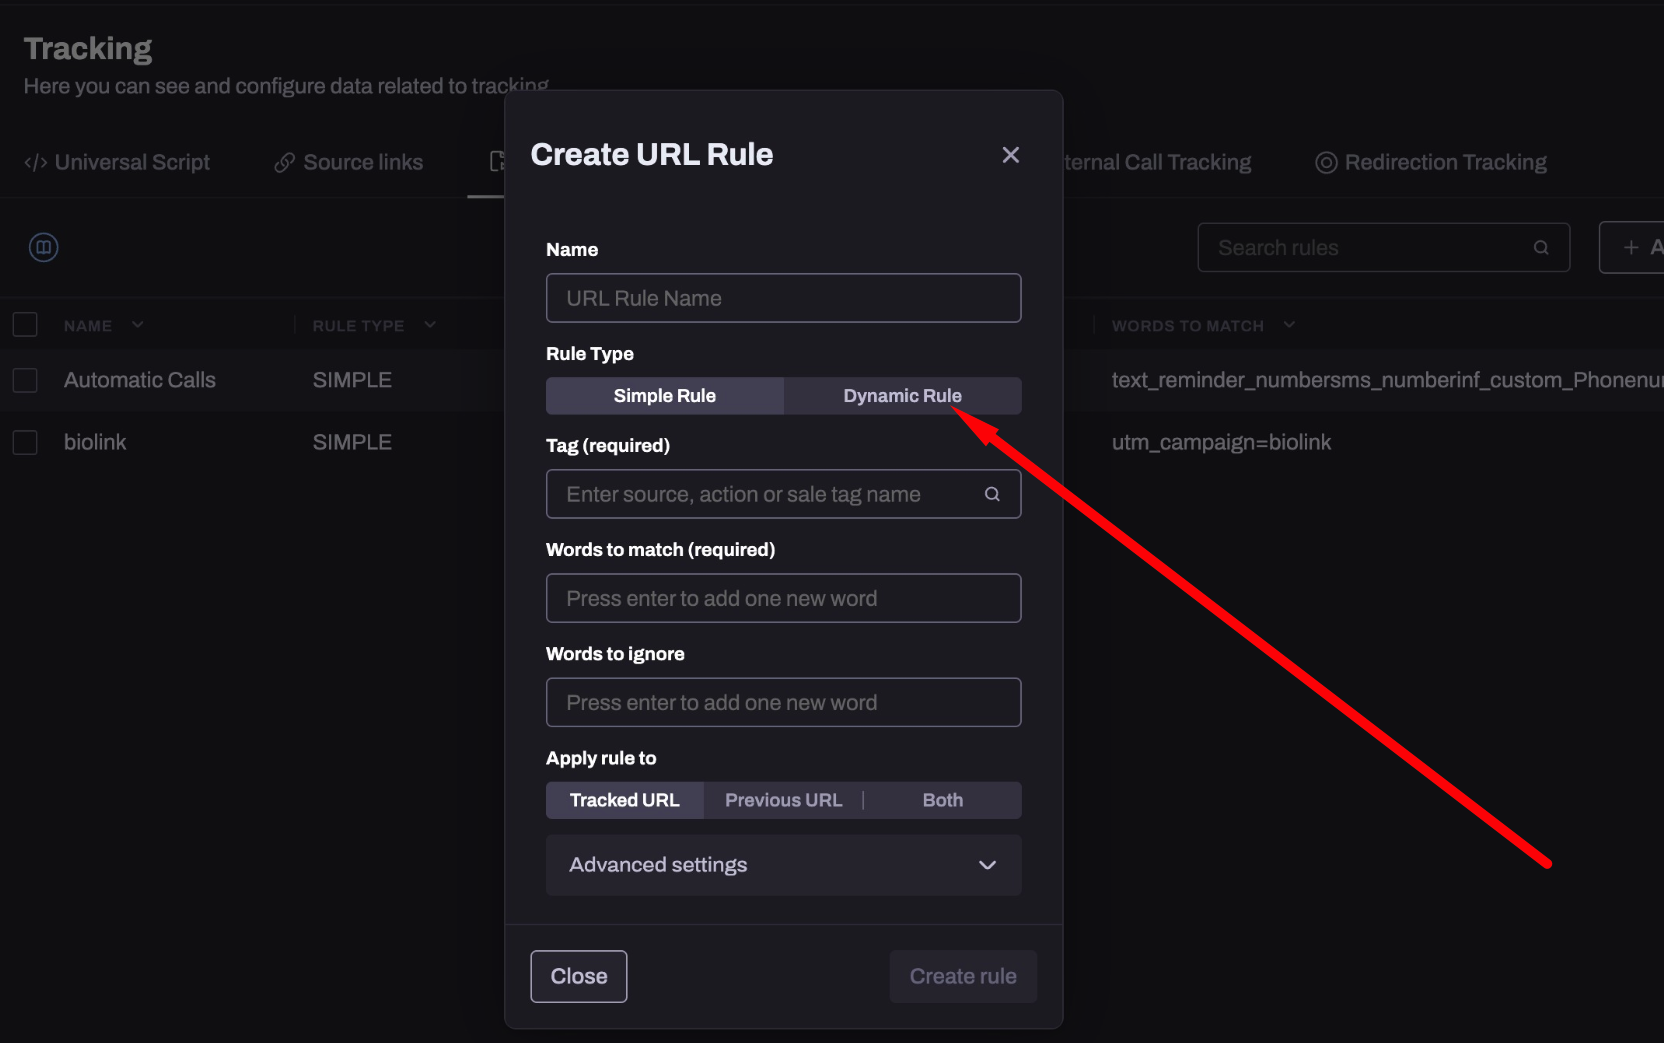
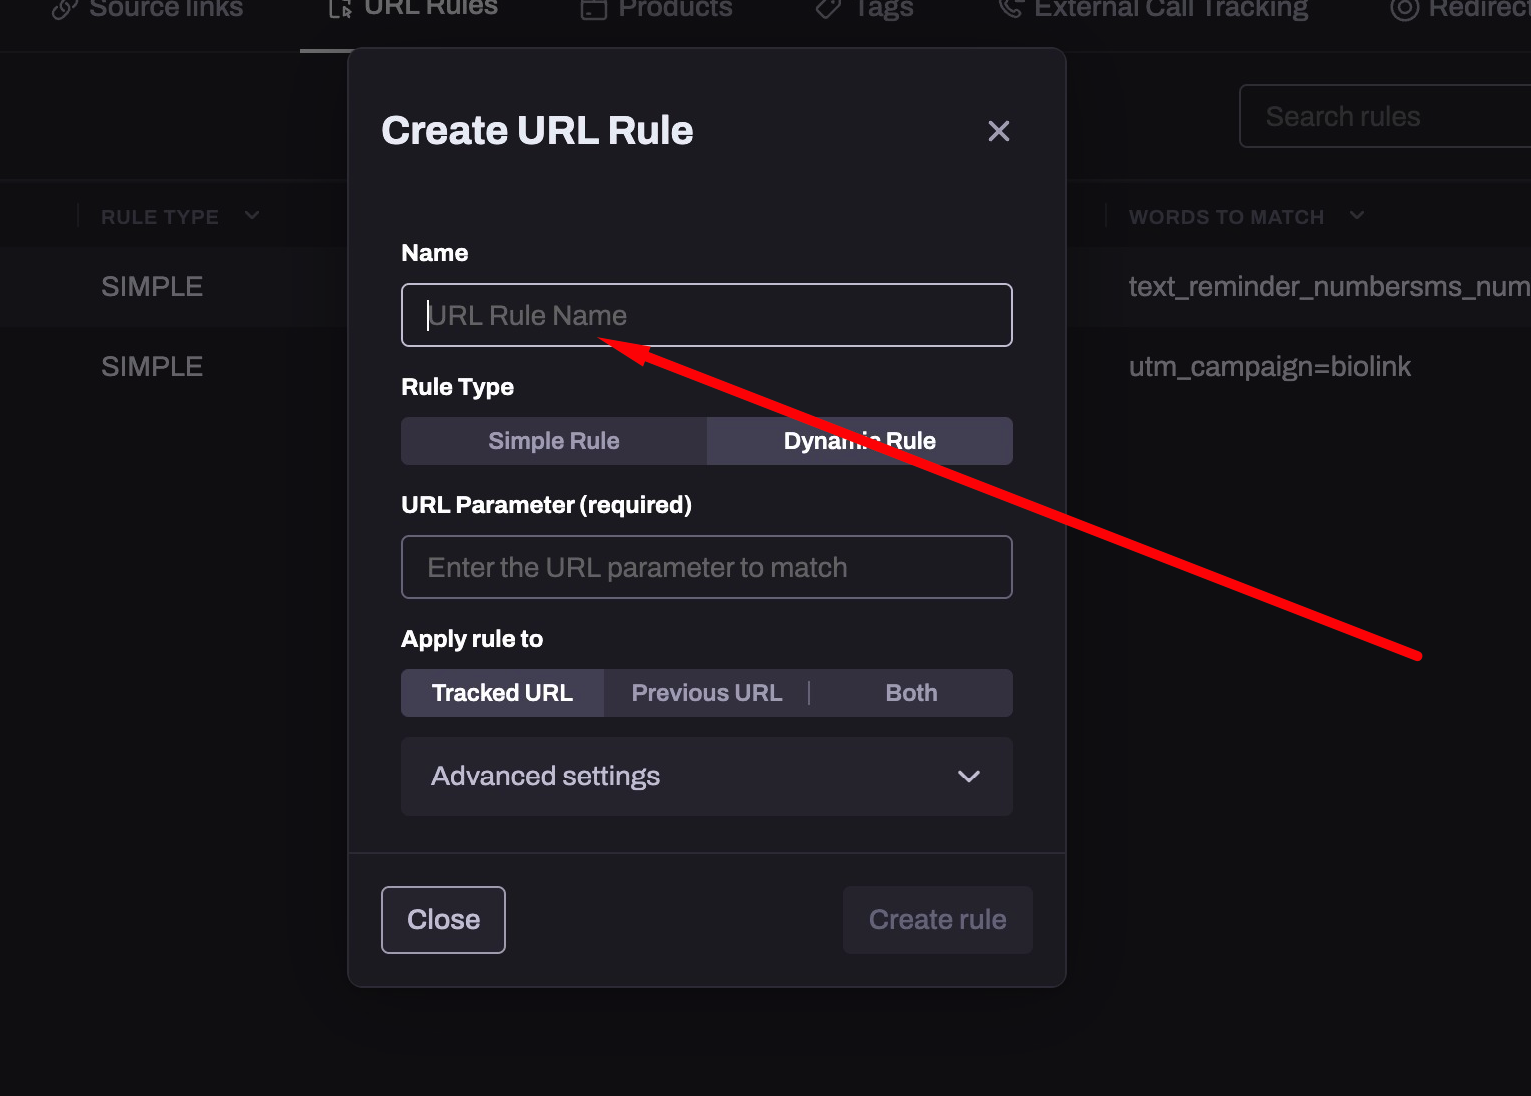
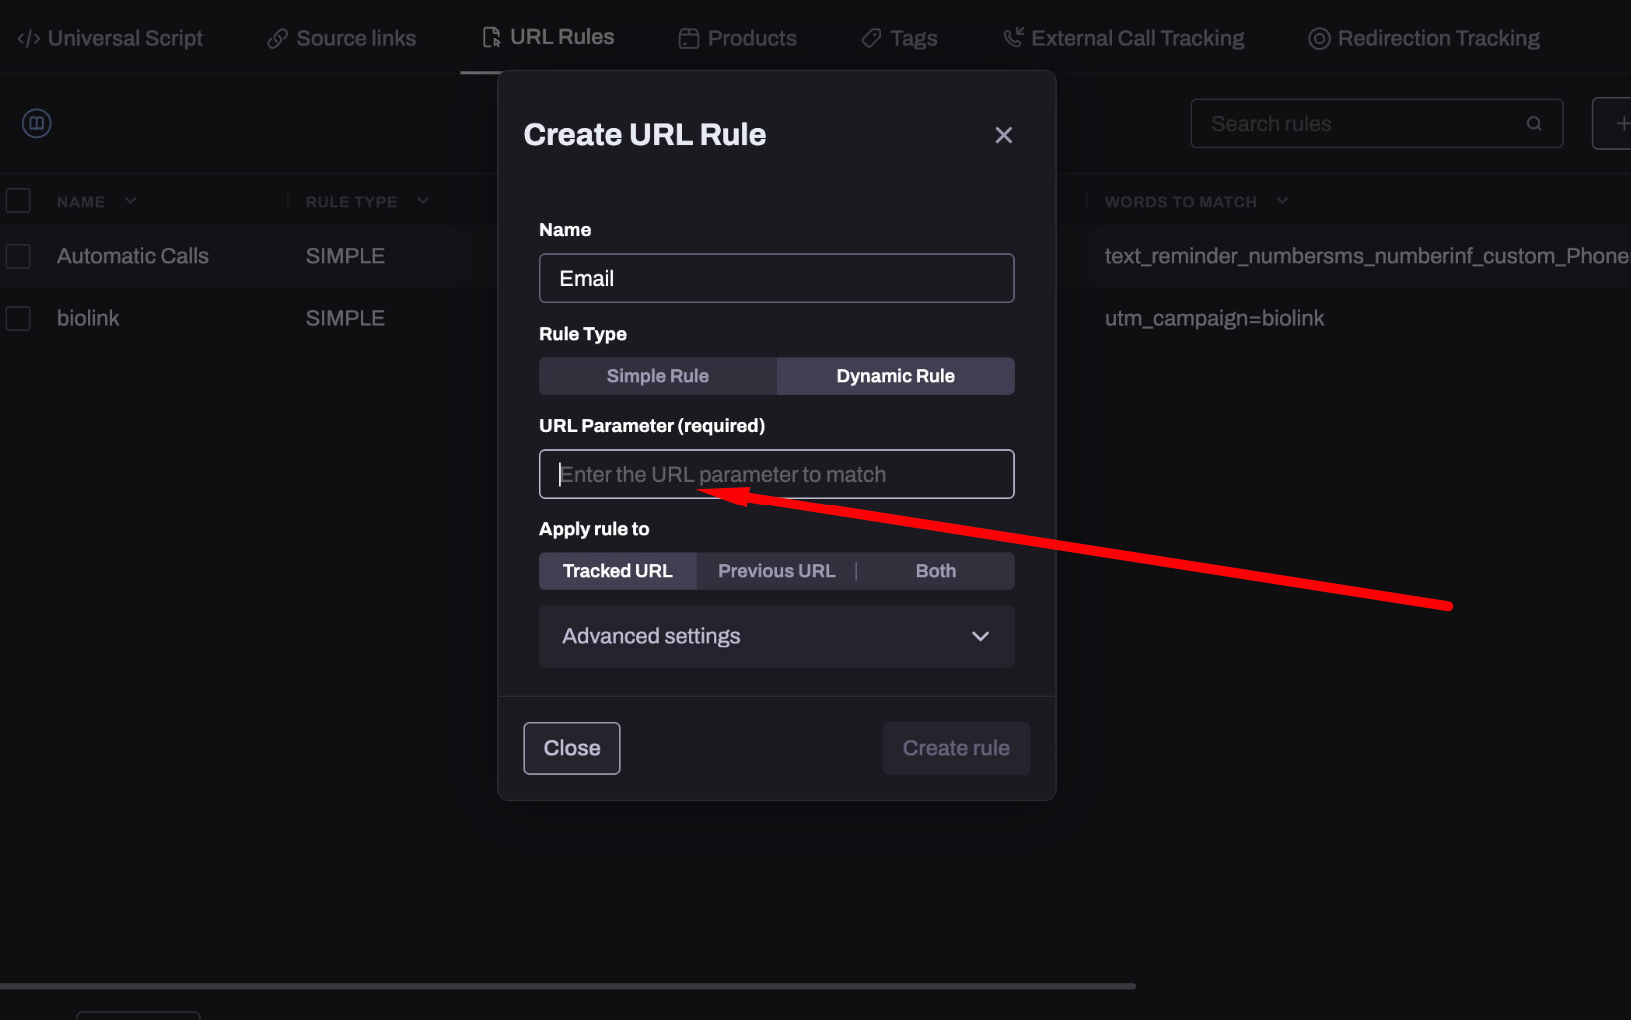
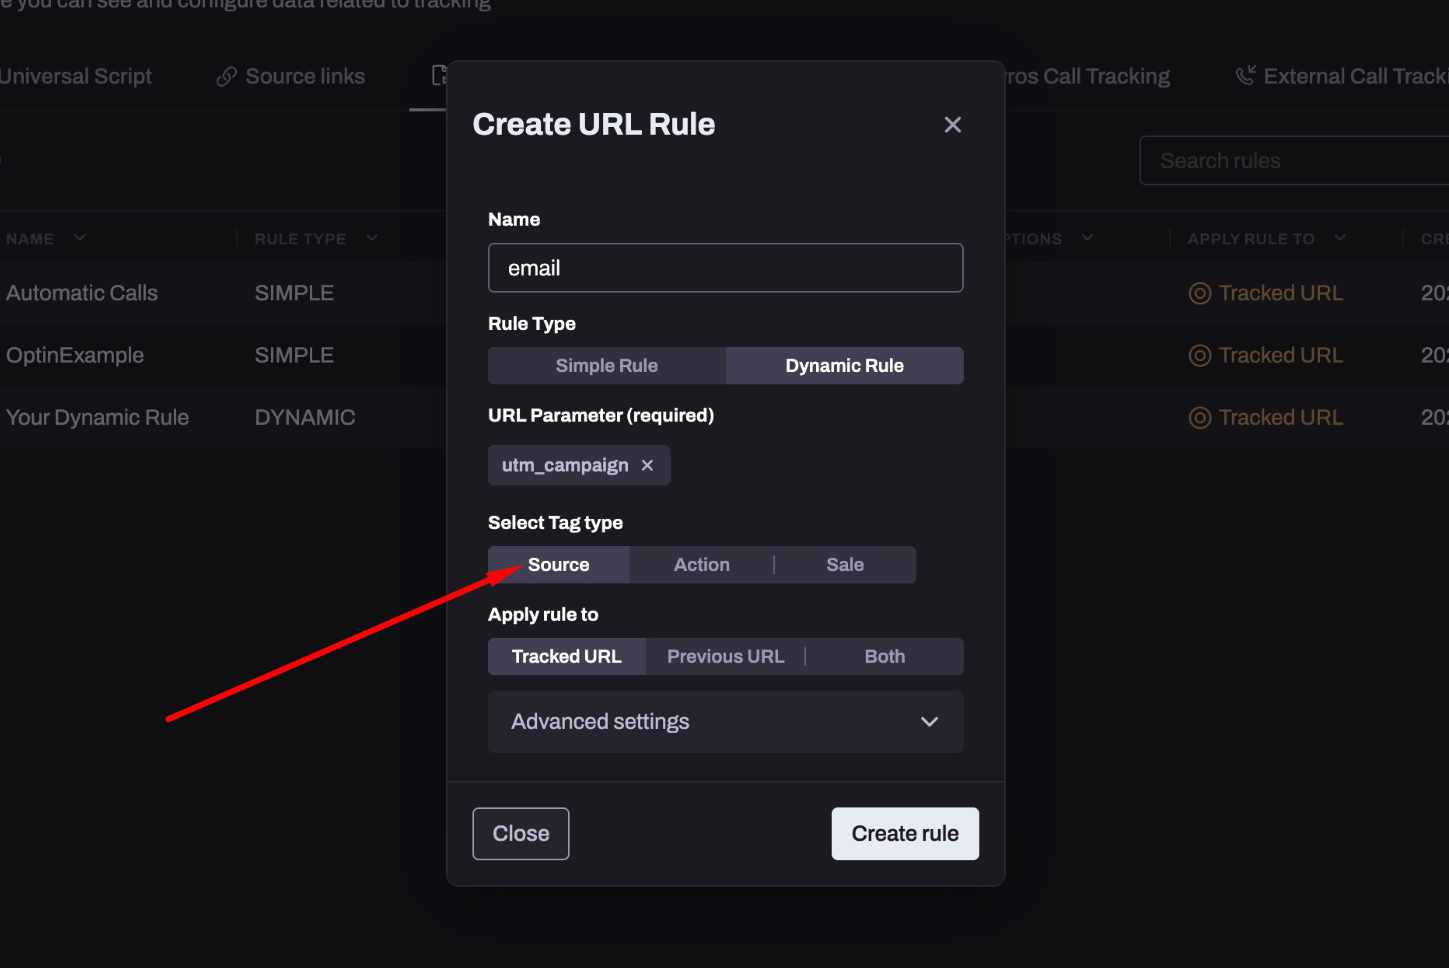
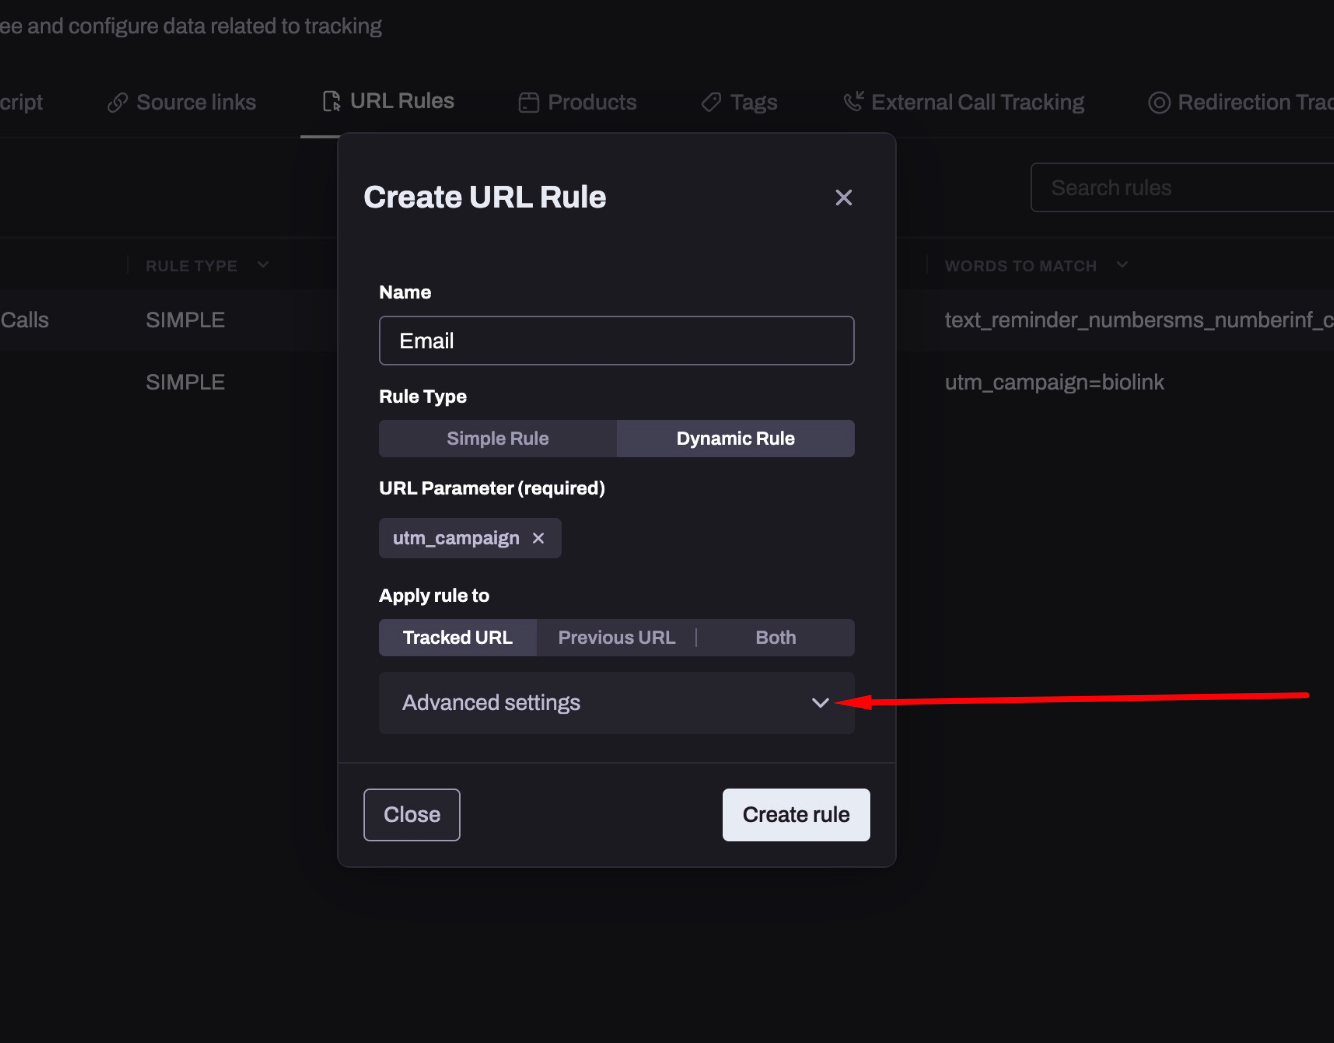
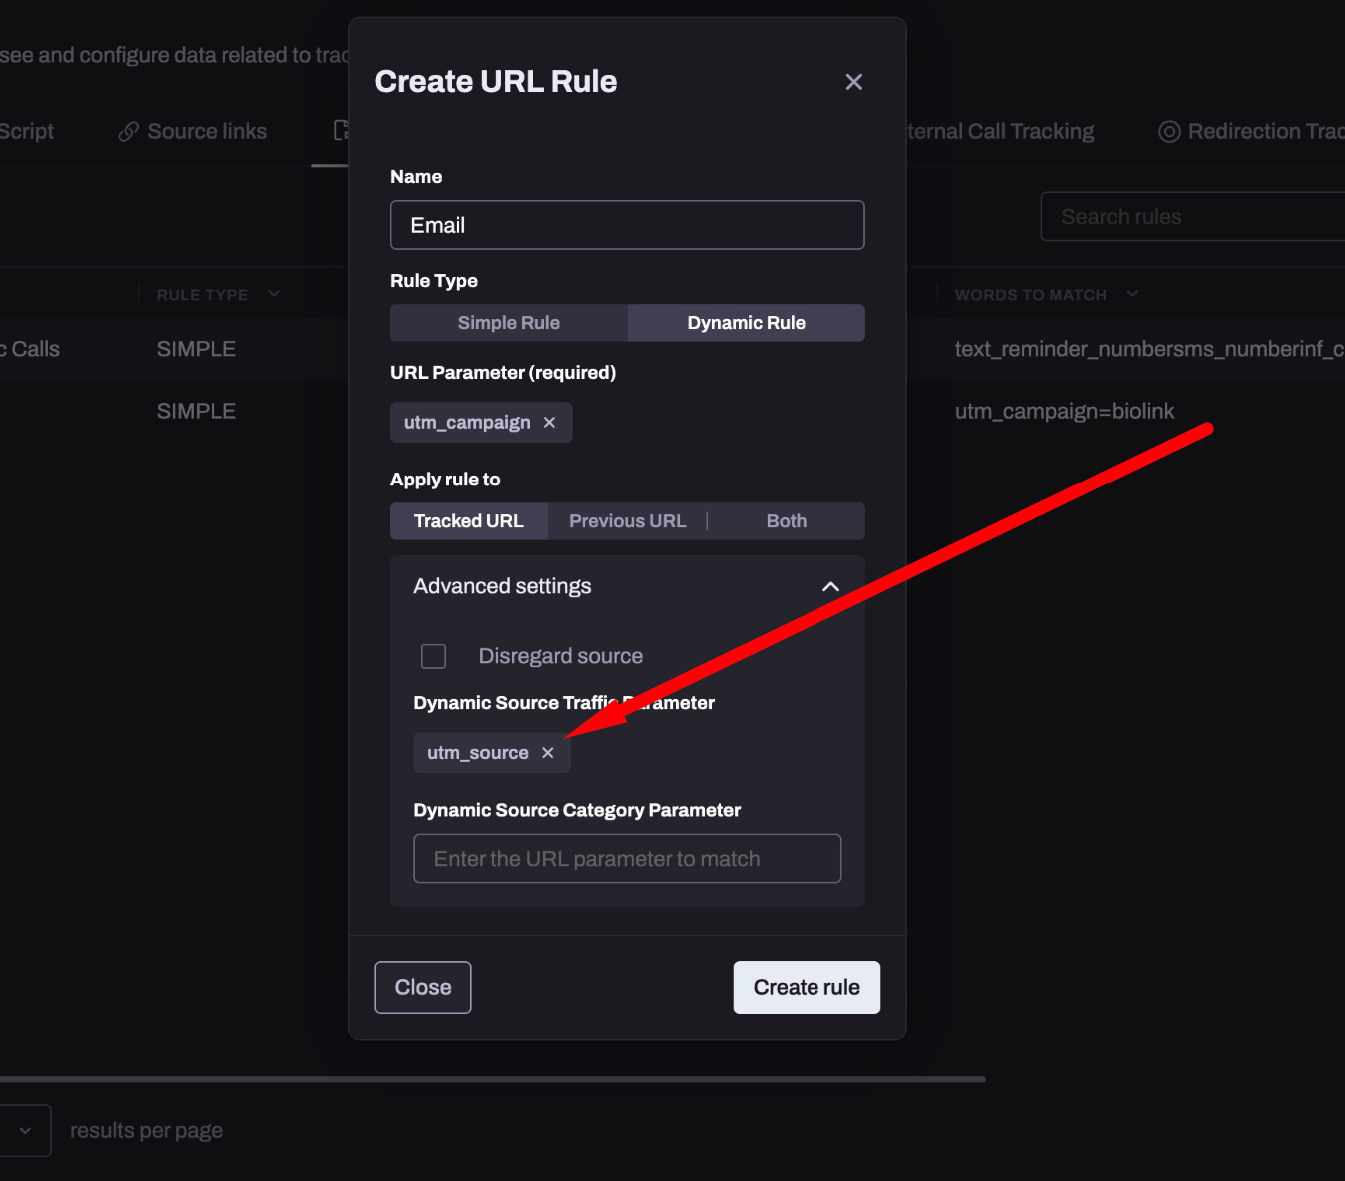
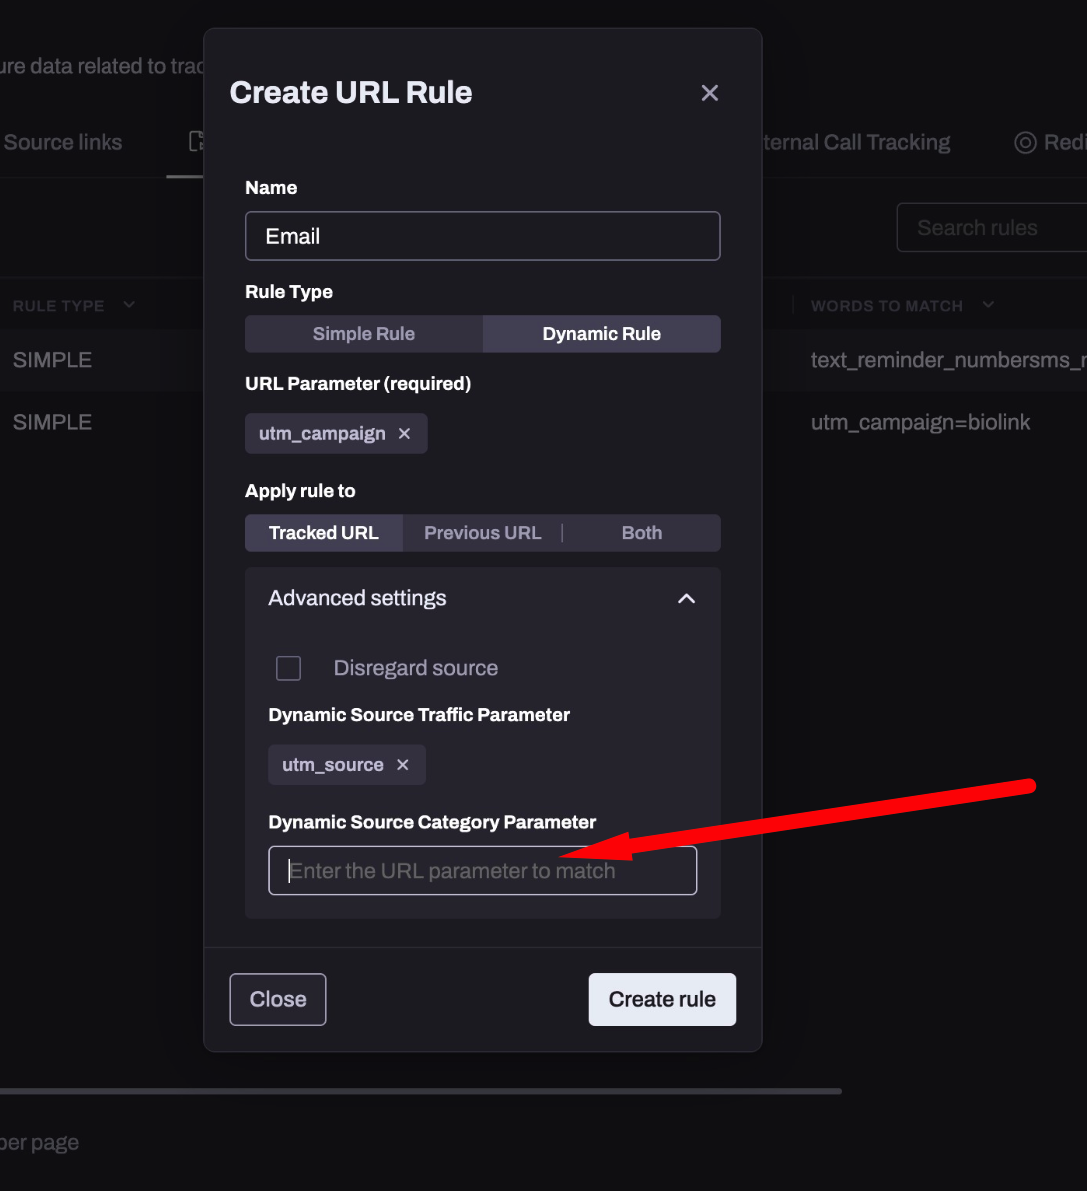
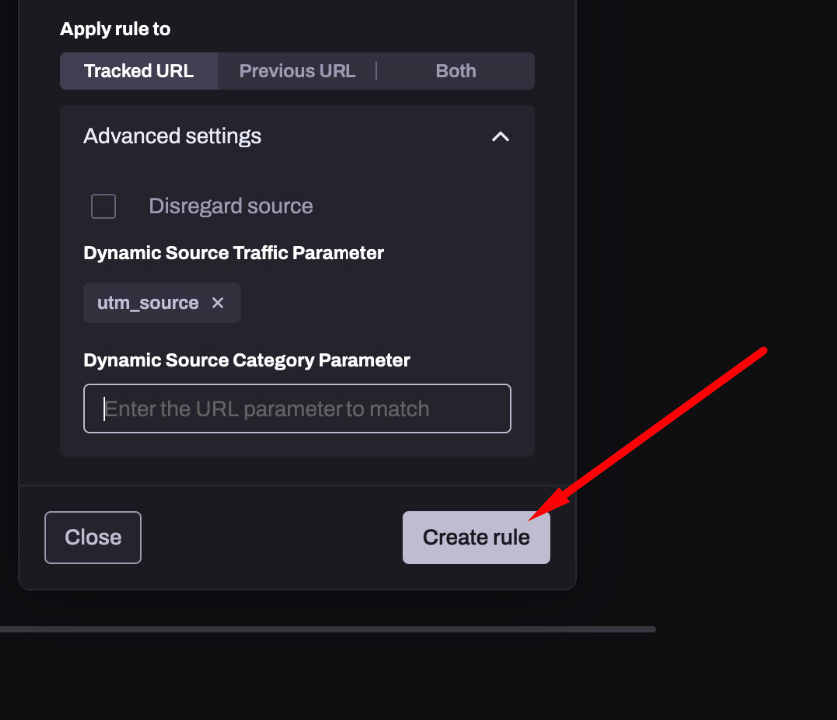
Follow the steps here to setup a dynamic URL rule to track whatever comes after utm_campaign as a source in Hyros, which means we’ll be tracking events back to the specific campaign they came from.
This will not effect other tracking such as ad tracking as long as you have already setup tracking correctly. For ad sources and other specific sources, we highly advise tracking them following their specific guides before proceeding with these steps:
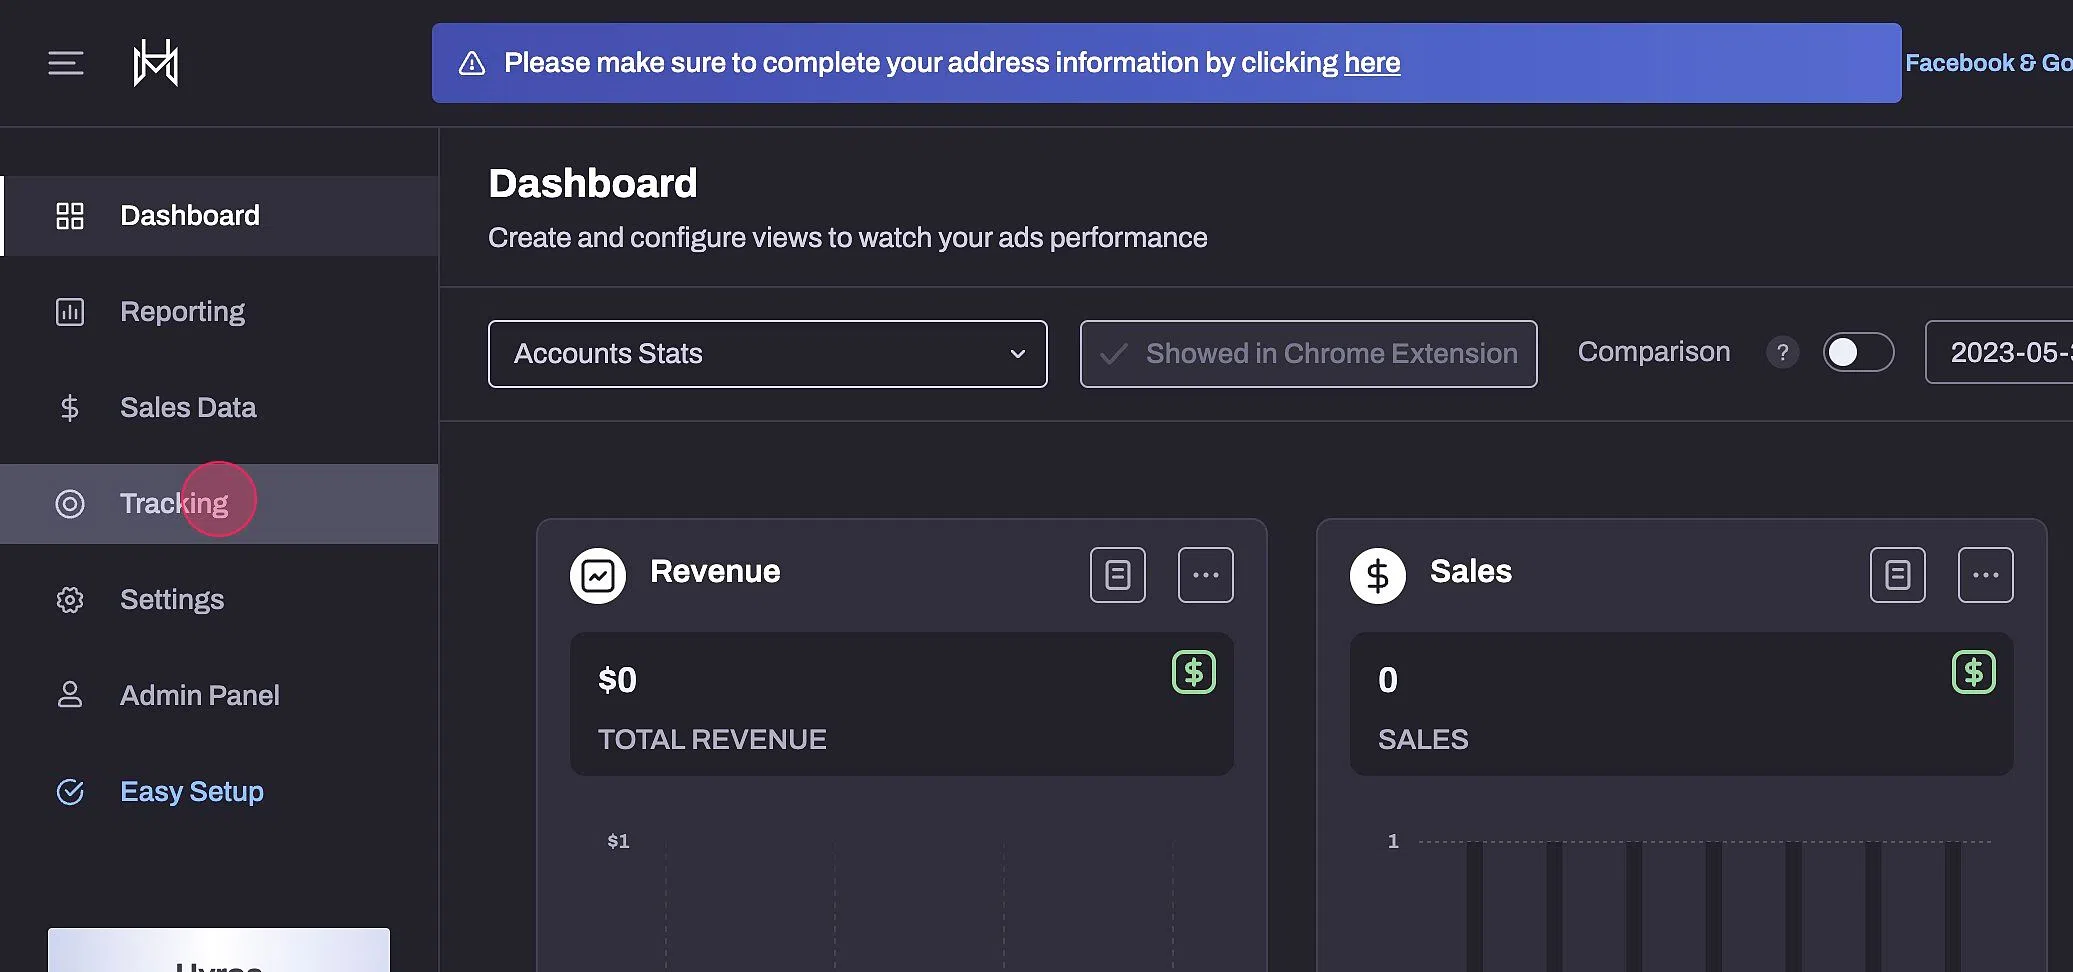
1. Navigate to https://app.hyros.com/tracking/url-rules
You can also get there by clicking “Tracking” and then “URL Rules” in your Hyros account.
This will conclude the setup, however please proceed to the next step if you want to optimize tracking by passing on the lead email.
Step 3 – Add the lead email to the URL (Optional step)
This step is optional as tracking the source click is already done by the URL rule you setup in the previous step.
If you decide you don’t need to do this, please move to step 4 to test your email tracking.
What does this do?
This step is used to optimize tracking by passing on the lead email when they click on a call to action link in one of your emails.
The reason this might be needed, is although Hyros is very effective at tracking leads across multiple devices over a long time period, there may be some rare cases as described here that cause attribution to fail:
If you’d like to set this up for optimized tracking please see the below:
Adding the parameter
Please copy the following code for Klaviyo:
?he={{ email }}
Unfortunately Drip does not allow you to add the above UTM globally even as a custom UTM, because they don’t have an option to add the dynamic {{ email }} code to the global settings, nor do they allow you to do this at campaign or flow level to our knowledge.
Therefore the only way to add this is directly on the call to action link itself on each of your emails.
So for example if your call to action link is the following:
www.yourlandingpage.com
Then add the above parameter manually to the end of the link like this:
www.yourlandingpage.com?he={{ email }}
Step 4 – Test your Campaign or Flow
Following Klaviyo’s guides beflow send yourself a test email campaign or SMS.
Test your email campaigns here.
Click on the call to action link and find the URL. You should see the standard UTMs attached cleanly in the URL like this:
www.yourlandingpage.com?utm_source=email&utm_campaign=emailcampaignname
If you have added the “he” UTM parameter following step 3, you should also see that included in the URL with the email clearly attached like this:
www.yourlandingpage.com?he=johndoe@hyros.com&utm_source=email&utm_campaign=emailcampaignname
Please take in mind some email softwares won’t display the dynamic data as expected in test emails, so you may see slightly different information than you were expecting. The important thing is that the UTMs are present and cleanly attached to the end of the URL.
Go through the funnel and opt in, book a call or checkout as if you were a lead.
After waiting a few minutes you should be able to find your tracked email under sales data -> leads. Click on the email and you should see the email source attached:

If you see this tracking has been successful!
If you do not see this , please follow the troubleshooting steps below:
If you don’t see your email
- If you haven’t done so yet, make sure you follow the funnel steps and submit and email.
- Make sure the universal script is added to all your pages, including on the page where you entered your email (such as the opt in or checkout page).
If you see the email but no @source tag in the journey
- Check the UTMs are being passed on correctly to the URL after clicking on an email link.
- Ensure the URL rule you setup in step 2 is added correctly. Check for typos in the “URL parameter” field, it must match exactly with the UTM in the URL.
- Ensure the landing page has the Hyros Universal script attached
FAQ
