Recurly Integration
To connect Recurly to Hyros follow the steps below.
Step 1 – Create the integration inside Hyros
1. Go into settings -> integrations -> select the Recurly Integration.
2. Click “Create New Integration”.
3. Create a name for the integration, such as “Recurly”.
4. Get your Private API key from Recurly and the Store domain, then paste it in the field inside your integration, to do this just follow these steps:
- 4.1 The Store domain – the store domain is obtained from the store URL when you log in inside your Recurly account. Example: www.domainname.recurly.com. “domainname” will be the store domain that needs to be added for creating the integration.
- 4.2 Private API key: you need to go to Integrations, API credentials, and copy the Private API key.
Step 2 – Add the Webhook
1. Go to your Recurly integration inside HYROS and click “configure”.
2. Click “Get Webhook” and copy the webhook.
3. Past the webhook inside your Recurly account by following these steps:
- Go to Integrations
- Select Webhooks
- Click on the Configure/create webhook button
- Click the New endpoint button.
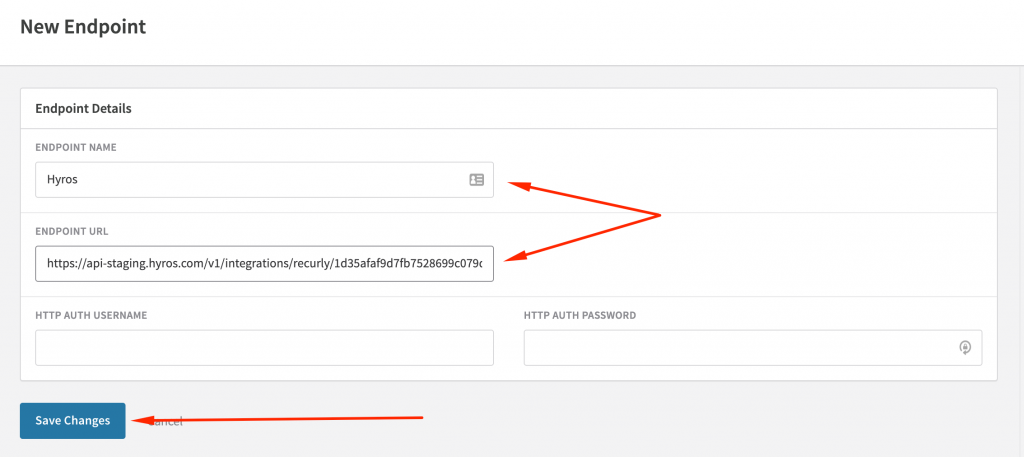
In the current form you need to add the following:

- Endpoint name: you can enter any name, for example, Hyros.
- Endpoint URL: here you need to paste the webhook that you just copied earlier from the Recurly integration.
That concludes the Recurly integration.