Option 1 – Tracking your Sales via Payment Processors
This step will involve integrating directly with your payment processor or checkout to allow us to receive sales directly from them.
Avoid Duplicate Sales!
Here you may have an option to integrate at different levels, particularly:
1) Checkout Software
2) Payment Processor Software
Please only integrate with one of these, if you integrate with both a checkout software and a payment processor software, then the same sale will be sent to us from both.
You can integrate with multiple softwares at the same level, providing the same sale does not go through both softwares. For example integrating with both Stripe and Paypal (both payment processors) is fine.
Below you will see guides for integrating with payment processors, and then checkouts. Please choose one.
If available for your stack, normally integrating your payment processor is best unless stated otherwise!
Paypal
Using Thrivecart Checkouts?
Although normally we recommend integrating at processor level, we suggest in this case integrating with your Thrivecart checkout instead. This will ensure Paypal sales are tracked accurately along with payments from any other processor.
Step 1 – Enabling transaction ID for Optimized Tracking Accuracy
Follow the steps below to enable Paypal to pass on a transaction ID to the thank you page. This will enable Hyros to track as accurately as possible:
Step 2: Integrate with Paypal
Go to the Paypal Webhook integration settings HERE and follow the prompts, you’ll need to enter your credentials to create the integration.
Stripe
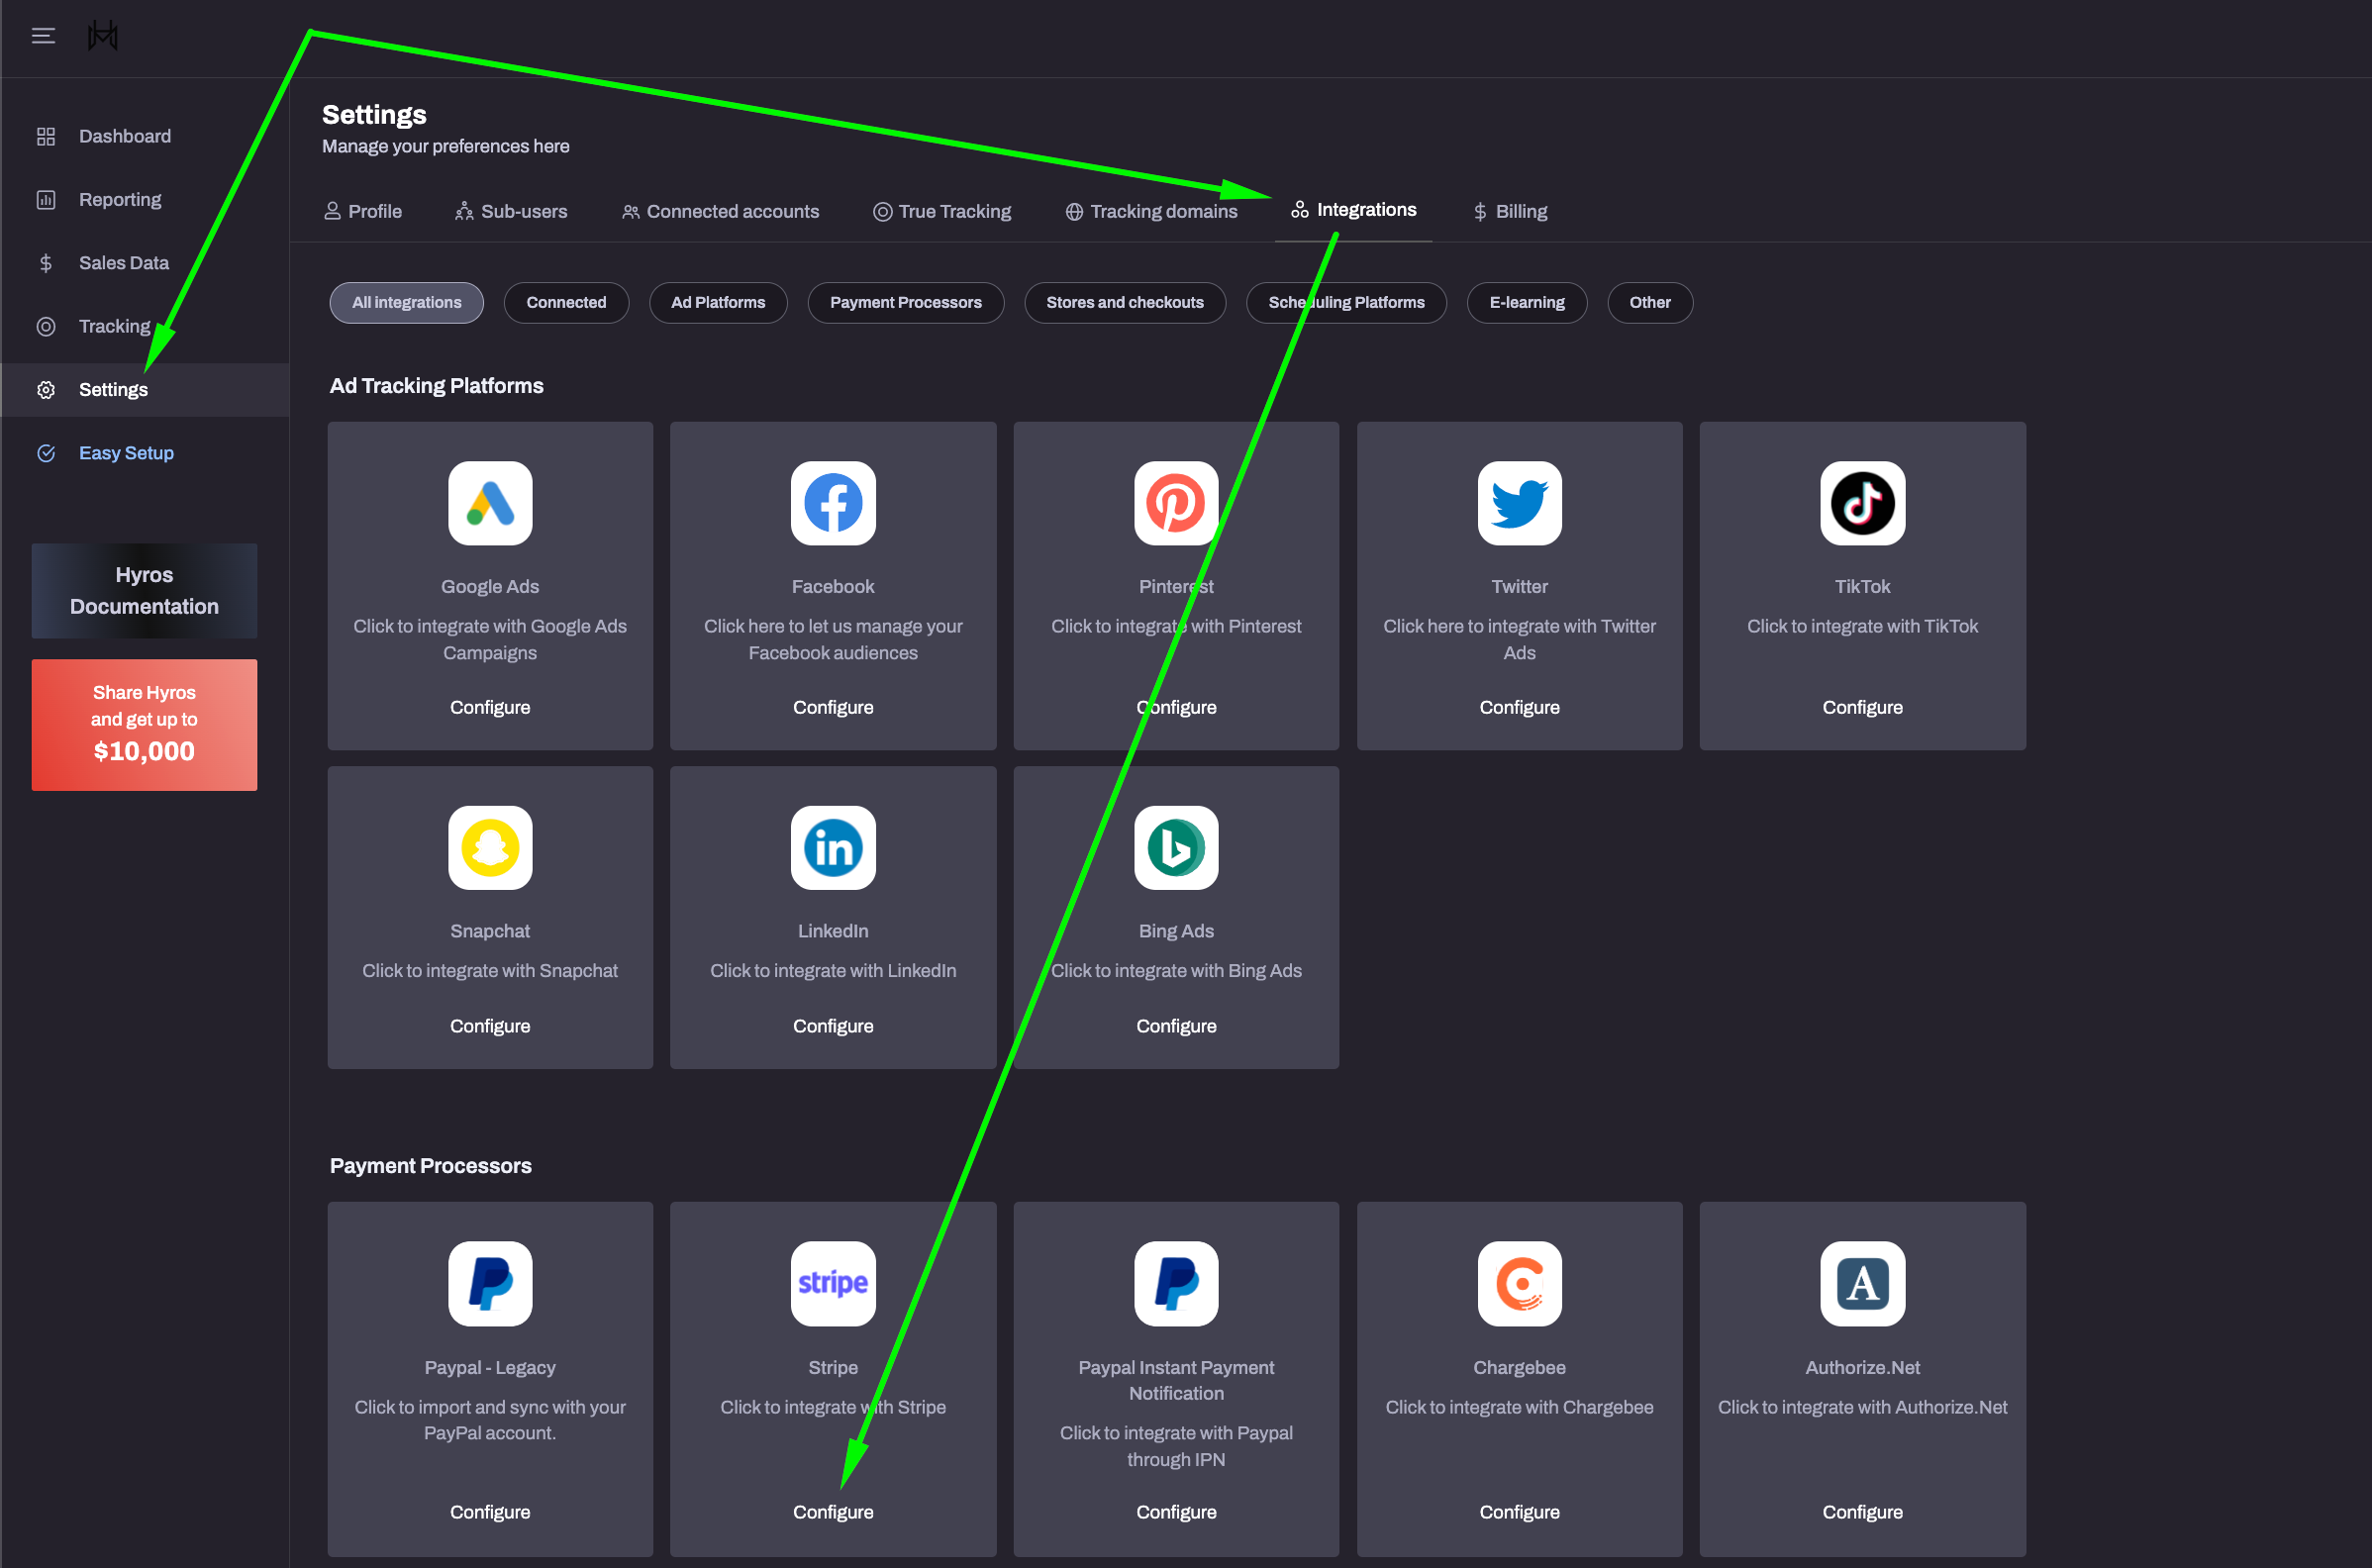
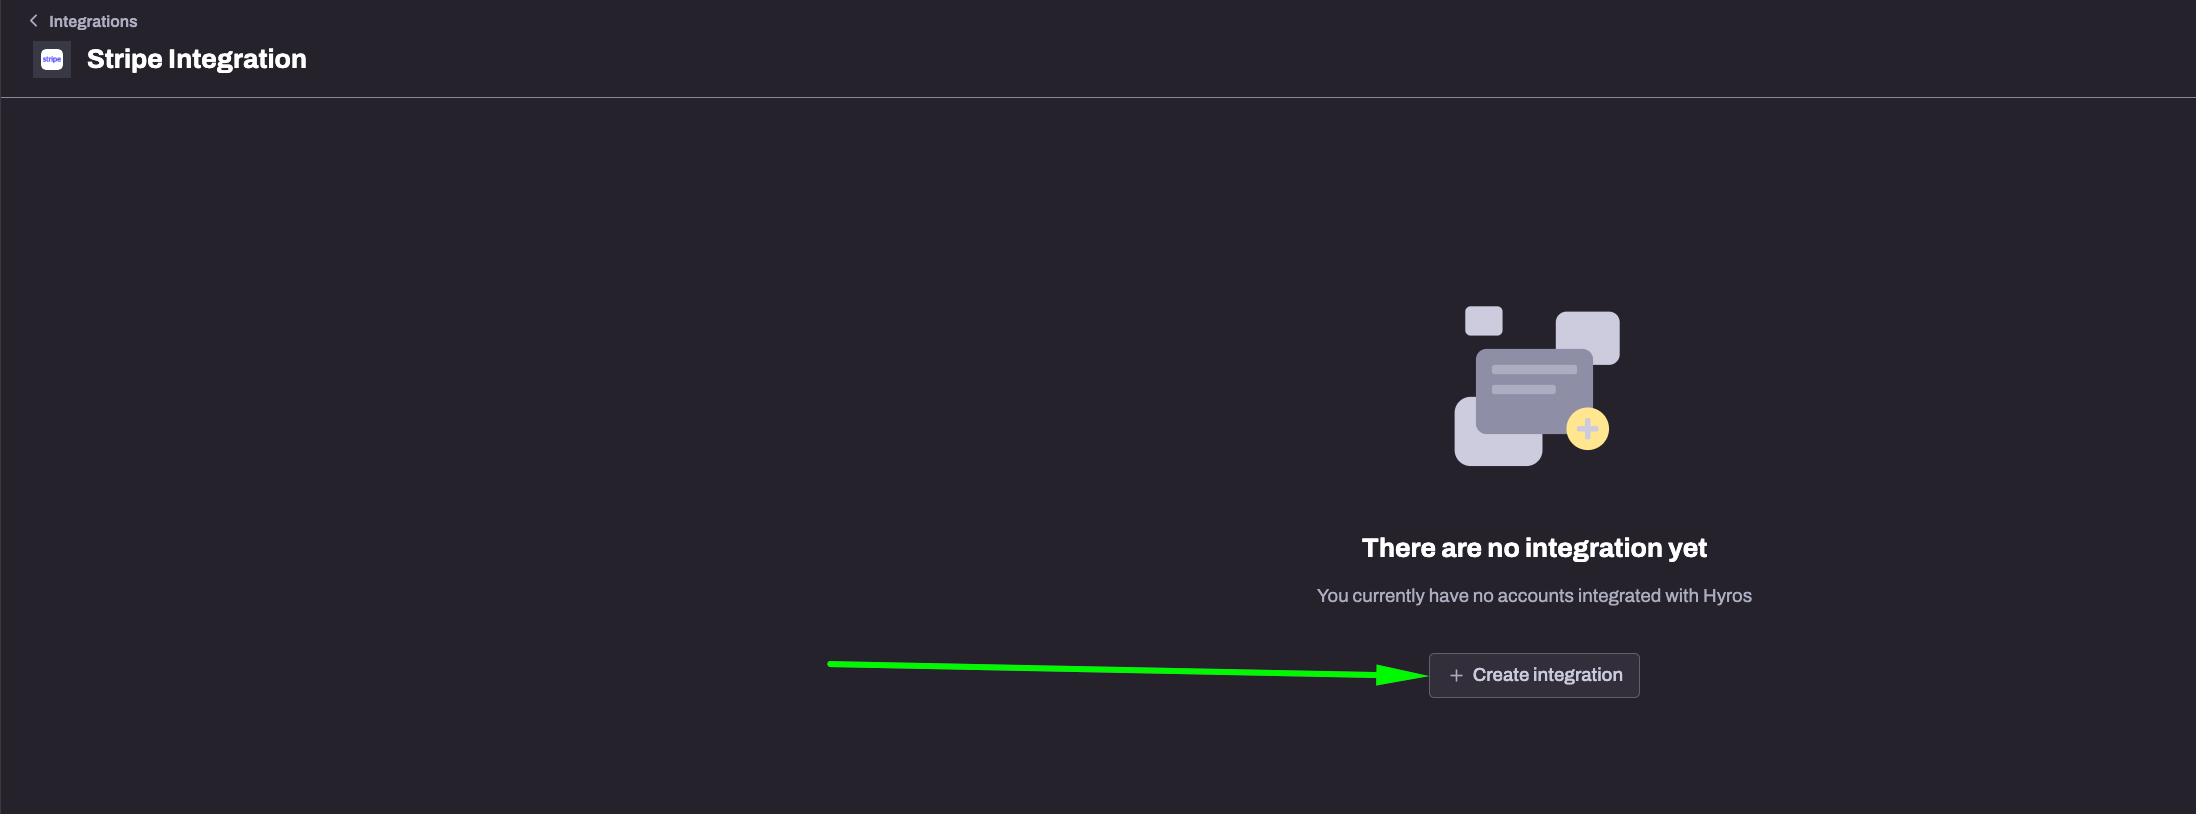
Log into Hyros, go to Settings, Integrations and search for the Stripe integration (or click HERE), and click on Configure. Then click “create integrations” and follow the prompts to integrate.
Sales should not be coming in from Stripe moving forward, repeat these steps for any other stripe accounts you have.
GoCardless
Click HERE and follow the instructions. You will need to log into Gocardless when prompted.
When you have finished, we recommend running a test payment to confirm that the sale is tracked in Hyros.
NMI
Please follow the steps in the video to integrate with NMI:
Sales without any Products associated in NMI
In the case that no product inside NMI is assigned to the sale, a product will be created with the generic name “NMI Integration Generic Product” inside Hyros.
Authorize.net
To connect Authorize.net to Hyros follow the steps below.
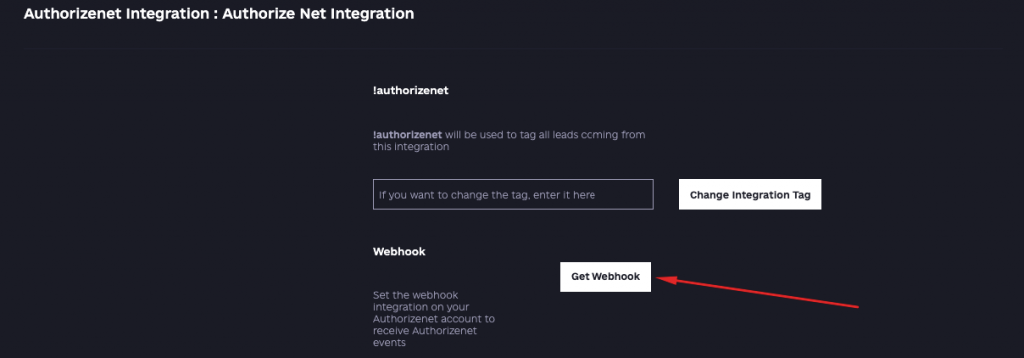
- Inside your Hyros integration settings, go to the Authorize.net integration HERE.
- Now follow the prompts given to set up the integration in Hyros. You will need to find the following from your authorize.net account:
API Login ID
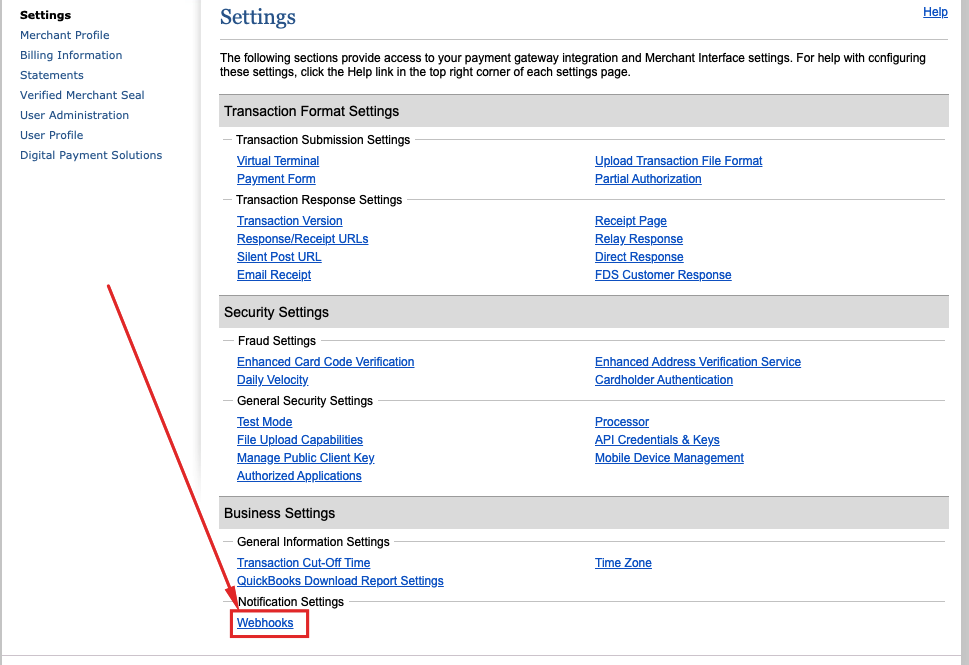
Transaction Key - Go to “Account” -> “Settings” -> “API Credentials & Keys” inside Authorize.net to find these, and then use them to create the Hyros integration
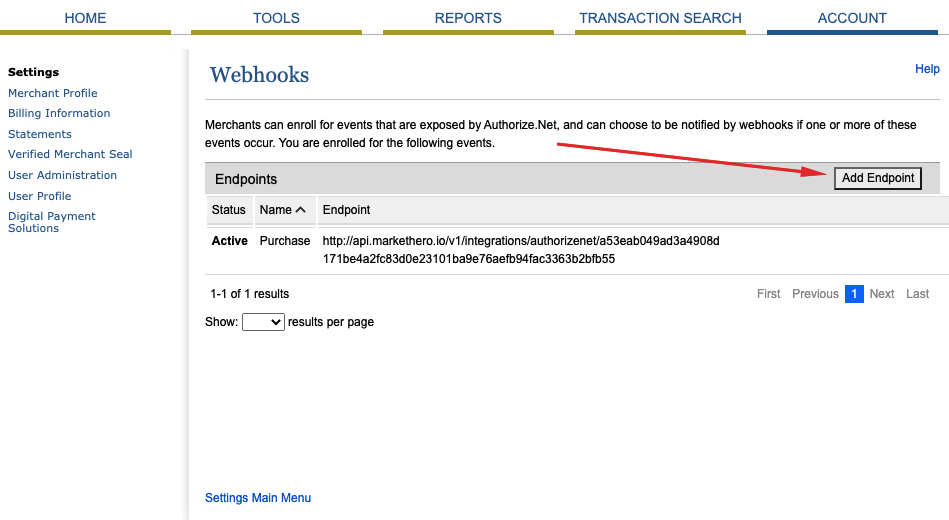
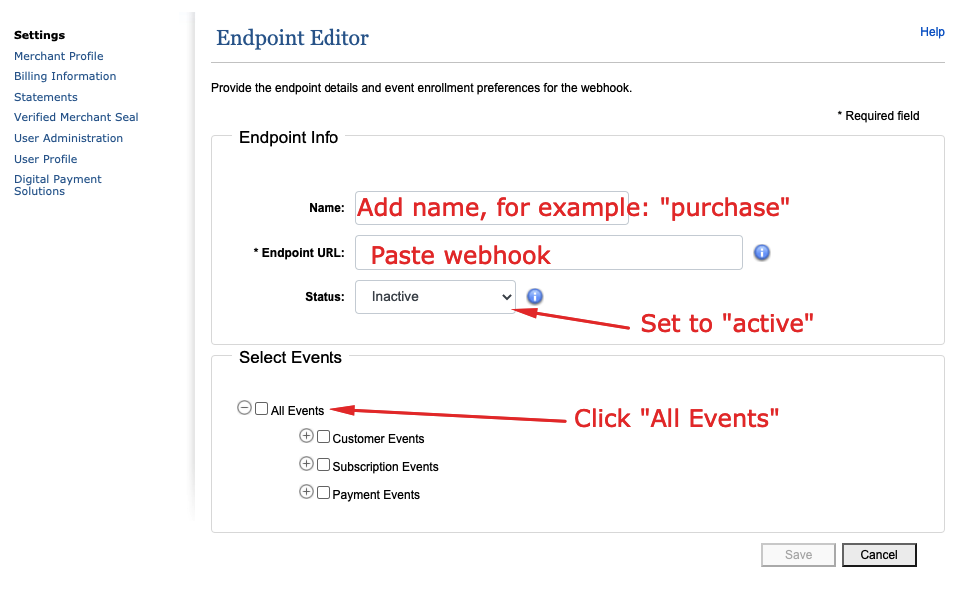
- Once the integration is created, copy the webhook and then go back to your Authorize.net account. Select “settings” -> “webhooks” -> “Add endpoint”:


