If you are getting a CHECKOUT failure in the HYROS SET UP EXTENSION (HSE) please find the cart/checkout system you are using below and double check the set up with the guides and troubleshooting tips.
If you find a mistake restart the testing in HSE. If it still reports a failure OR you cannot find the problem contact our support for help.
This video will explain how we track a customer conversion all the way back to the original ad click.
After the initial opt in HYROS will watch visitors going to your checkout pages via the WATCHER script in the header of the checkout page. When a visitor lands that has matches from a profile seen before HYROS will recognize the user. If the user then checkouts out HYROS will ad the sale and sale amount to the user profile.
Because the full users ad and click history is already attached to the profile the system can match the sale to the user and original ad clicked.
Choose Your Checkout System
IMPORTANT : Do not integrate a checkout system AND a processor. It will cause the checkout system to send in a sale and then cause the processor to send in the same sale causing DUPLICATE sales. Integrate ONLY a checkout or ONLY a processor, not both.
Clickfunnels With Stripe ONLY Video Guide
Here is the code need for this integration
Written Guide
1- Take the UNIVERSAL code above and place it in the header of the funnel or checkout page you wish to track
2- Integrate with Stripe HERE
This will complete set up.
Now Run This Test
Perform a test checkout on your Clickfunnels checkout.
Then check your reporting area HERE
You should see
1- A sale with your test checkout email, click the email.
If there is no sale check your Stripe integration.
2- Under IP you should see an IP address.
If there is no IP confirm that you placed the universal code on the correct checkout or funnel.
IF you see both, move to the next step.
Kajabi With Stripe ONLY Set Up Guide
Here is the code need for this integration
Written Guide
1- Copy the UNIVERSAL code above
2- Login to Kajabi and go to site settings in the lower left hand corner of your dashboard.
3- Form site setting go to Checkout setting.
4- Paste the script in the “header tracking” code form.
5- Integrate with Stripe HERE
This will complete set up.
Now Run This Test
Perform a test checkout on your checkout.
Then check your reporting area HERE
You should see
1- A sale with your test checkout email, click the email.
If there is no sale check your Stripe integration.
2- Under IP you should see an IP address.
If there is no IP confirm that you placed the universal code in the checkout header in Kajabi.
IF you see both, move to the next step.
Thivecart With Stripe ONLY Set Up Guide
Here is the code need for this integration
Written Guide
1- Copy the UNIVERSAL code above
2- Login to Thrivecart and go to products.
3- When under products go to “checkout” and then “tracking”
4- In tracking check the “custom tracking code” box
5- Paste the UNIVERSAL code in the “ALL PAGES” form.
Repeat this process for every product you wish to track.
6- Integrate with Stripe HERE
This will complete set up.
Now Run This Test
Perform a test checkout on your checkout.
Then check your reporting area HERE
You should see
1- A sale with your test checkout email, click the email.
If there is no sale check your Stripe integration.
2- Under IP you should see an IP address.
If there is no IP confirm that you placed the UNIVERSAL code in the custom tracking code area of your products.
IF you see both, move to the next step.
Clickfunnels Checkout Video Set Up
Here are your tracking scripts you will need for this set up.
Written Set Up Guide
If you are using Clickfunnels checkout follow the directions below
1- Place your UNIVERSAL script in the header of the checkout page you wish to track in Clickfunnels
2- Create a webhook using the CLICKFUNNELS INTEGRATION HERE
3- Once the integration appears, click “configure”. Then click “get webhook”.
4- Copy the webhook and go to the “SETTINGS” area in the Click Funnels funnel that houses the checkout you wish to track
5- Scroll down and click Webhooks
6- Paste the webhook you copied into the webhook URL
7- Under events ONLY ADD “purchase created” “purchase updated” “purchase destroyed”
8- Leave all other options alone and complete the webhook set up.
9- You have now completed your Clickfunnels set up.
Complete this process on any other checkouts you wish to track and move towards “testing and confirming tracking” at the bottom of this document.
Now Run This Test
Perform a test checkout on your checkout.
Then check your reporting area HERE
You should see
1- A sale with your test checkout email, click the email.
If there is no sale check that you placed the Clickfunnels webhook correctly.
2- Under IP you should see an IP address.
If there is no IP confirm that you placed the UNIVERSAL code in the header of the funnel or checkout page.
IF you see both, move to the next step.
Thrivecart With Paypal Video Set Up Guide
Here is the script you will need for this set up
If you are using Thrivecart checkout follow the directions below
1- Create a webhook using the THRIVECART INTEGRATION HERE
3- Once the integration appears, click “configure”. Then click “get webhook”.
4- Copy the webhook and go to the “SETTINGS” area in your ThriveCart dashboard
5- Go to “API and Webhooks”
5- Click “Ad Another Webhook”
6- Paste the webhook you copied into the webhook URL
7- NEXT : Return to HYROS and copy your UNIVERSAL script (above) under TRACKING->TRACKING SCRIPTS
8- Return to your Thrivecart dashboard and go to products.
9- Click “edit” on the product you wish to track.
10- When in the product screen go to CHECKOUTS
11- After clicking CHECKOUTS go to tracking
12- Activate custom tracking
13- Paste your UNIVERSAL script in the input box and hit save.
This completes your Thrivecart Integration.
Now Run This Test
Perform a test checkout on your checkout.
Then check your reporting area HERE
You should see
1- A sale with your test checkout email, click the email.
If there is no sale check that you placed the Thrivecart webhook correctly.
2- Under IP you should see an IP address.
If there is no IP confirm that you placed the UNIVERSAL code in the custom tracking area of the product you wish to track.
IF you see both, move to the next step.
Kajabi Checkout With Paypal Video Set Up Guide
If you are sending customer to a Kajabi checkout page for purchase
1- Integrate with Kajabi by using our KAJABI INTEGRATION HERE
2- After integrating click “Configure” and then “Get Webhook”. Copy the webhook URL generated.
3- Go to your Kajabi admin dashboard and go to “SETTINGS” at the bottom of the left hand dashboard
4- Go to “checkout settings”
5- Place the webhook you copied in 2 under “Purchase Webhook URL”
6- NEXT return to HYROS and go to TRACKING → TRACKING SCRIPT
7- Click “Get Script” under the WATCHER script. Copy the script that is generated.
8- Return to your Kajabi dashboard and make sure you are still under “checkout settings”
9- Scroll down to HEADER TRACKING CODE
10- Paste your WATCHER code in the input under HEADER TRACKING CODE
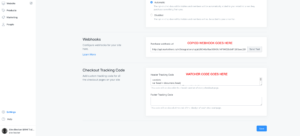
11- Hit save!
This will complete Kajabi checkout tracking
To connect teachable follow the video and written text below
Here is the script needed to complete this setup
1- Go to https://app.hyros.com/#/mh/external-services/cart-integration/teachable and complete the Teachable integration
2- Once done click configure and copy the webhook that has been created
3- Login into to your teachable account and select the school you wish to track with HYROS
4- Go to SETTINGS –> WEBHOOKS and click NEW WEBHOOK
5- Set the webhook to fire on a NEW TRANSACTION
6- Go to the course you wish to track via COURSE and then go to PAGES and then click EDIT on your thank you page
7- Ad a HTML block and paste this code in the block : <center><p id=”hyros-email”>{{current_user.email}}</p></center>
8- Scroll to the bottom of the thank you page editor and check the box to ad a custom header code. Paste the Universal Code below into the the code area
This will complete the Teachable checkout integration. Repeat this for all schools and course you want to track.
Now Run This Test
Perform a test checkout on your checkout.
Then check your reporting area HERE
You should see
1- A sale with your test checkout email, click the email.
If there is no sale check that you placed the Teachable webhook correctly.
2- Under IP you should see an IP address.
If there is no confirm that you placed the UNIVERSAL code on your thank you page and that the customer email code is on the page correctly.
IF you see both, move to the next step.
Samcart Video Set Up Guide
Here is the code you will need for this set up
- First step, go to the settings area of your Hyros account >
- Integrations >
- Click on the SamCart icon >
- Create new integration >
- Setup the integrations tag (name the integration in such way to recognize the lead’s traffic source, example: SamCart) >
- Click configure >
- Get webhook >
- Copy webhook;
- Log inside your SamCart account >
- Go to settings >
- Integrations >
- Click new integration >
- Notify URL >
- Name the integration (SamCart) >
- Paste the webhook inside the “Notify URL” > don’t forget to click save;
- Next step > Click global rules > setup rules > 2 rules need to be setup:
A. Product Purchased > click on next step > select the SamCart integration > action – send notify URL post > click next step > submit;
B. Subscription charged > (if you have a subscription-based business) > repeat the process mentioned above for the Product Purchased trigger;
- Next step you will need to place tracking on your SamCart checkout pages >
- Copy the UNIVERSAL code above >
- Tracking >
- After that go back inside your SamCart dashboard and go to products >
- Click on the product you are selling > once you are inside the product > Click on advanced settings >
- Paste the UNIVERSAL code inside the Embedded HTML/Scripts in Header area (this process needs to be done inside each single checkout page you have);
This will complete Samcart Set Up
Now Run This Test
Perform a test checkout on your checkout.
Then check your reporting area HERE
You should see
1- A sale with your test checkout email, click the email.
If there is no sale check that you placed the Samcart webhook correctly.
2- Under IP you should see an IP address.
If there is no confirm that you placed the UNIVERSAL code in the tracking code in the advanced settings area of the product you are trying to track.
IF you see both, move to the next step.
Pay Kickstart Video Set Up Guide
Here is the code you will need for this set up
Written Set Up Guide
1- Go inside of Pay Kickstart Integrations
2- Under autoresponder complete the integration with Market Hero. Your API key can be found under your HYROS profile under settings HERE
3- Next copy the Universal code above and paste it on the page your Pay Kickstart forms are embedded on
3.1- IF you are using Pay Kickstart for your checkout pages then go back to Campaigns and select the product you wish to track.
Then go down to CHECKOUT PAGE. Place the UNIVERSAL script under ADD CUSTOM CSS/TRACKING SCRIPTS
This will complete the integration.
You should see
1- A sale with your test checkout email, click the email.
If there is no sale check that you did not set up the Pay Kickstart integration right. Double check it.
2- Under IP you should see an IP address.
If there is no confirm that you placed the UNIVERSAL code in the header of your checkout page if your using embedded forms.
If your using Pay Kickstart pages, check that you added the UNIVERSAL code in the CUSTOM CSS/TRACKING code area.
IF you see both, move to the next step.
To connect Kartra checkouts to HYROS follow the video and written text below
1- Go to https://app.hyros.com/#/mh/external-services/cart-integration/kartra , set the name and tag to “Kartra” and follow the prompts to complete the integration.
2- Once down click configure and generate a webhook by clicking the GENERATE WEBHOOK button.
2- Once done login to your KARTRA account and go to INTEGRATIONS –>API–>MY API
3- Go down to outbound API and activate your outbound API function
4- You will see an option to ad an URL. Ad the webhook URL you generated in step 2
5- Set the webhook to fire when the product you want to track is bought at any price point. Ad all the products you want to track.
This will complete the Kartra checkout integration.
To connect Infusionsoft checkouts to HYROS follow the video and written text below
1- Go to https://app.hyros.com/#/mh/external-services/infusionsoft , set the name and tag to “infusionsoft” and follow the prompts to complete the integration.
NOTE: If you are running customer cards manually with sales reps stop here. If you are sending customers to a checkout page where they self checkout continue.
IF YOU ARE USING INFUSIONSOFT ORDER FORMS
2- Once done login to your Infusionsoft account and go to E-COMMERCE–>ORDER FORMS
3- Select the order form you wish to track. Once there go to the HTML AREAS tab
4- Paste the UNIVERSAL CODE below in the custom header area at the TOP of the code.
IF YOU ARE USING A CHECKOUT OR LANDING PAGE SOFTWARE THAT PLUGS INTO INFUSIONSOFT
2- Paste the UNIVERSAL CODE below in the HEADER of your checkout page
This will complete the Infusionsoft checkout integration.
If you are using Clickfunnels checkouts with Paypal the most accurate way to track is using CF Pro Tools.
This set up is a bit complicated and best for advanced users who need to track long term ROI and rebills.
We suggest most users stick with the basic Clickfunnels set ups found earlier in this checkout section, especially when first learning to use HYROS.
———————-
Why? Paypal and checkout emails are routinely different and this will break tracking. This is fixed by our basic integration with Clickfunnels above BUT rebills will not be tracked.
CF Pro Tools enables HYROS to receive the Paypal AND checkout email of the user. This allows us to tracking recurring charges.
If you are NOT using Paypal OR a processor other than Stripe just use the Clickfunnels+STRIPE ONLY integration above.
———————-
Set Up Guide
Step 1 : Sign Up For CF Pro Tools HERE
Step 2 : Once signed up, set up your checkouts to use the PAYPAL PLUS ad on.
Set this up on ALL of your checkouts that you wish to track.
Step 3 : Then set up the HYROS PAYPAL EMAIL ad on.
Place the code generated inside of CF Pro on the thank you you page of your checkout out (or the first upsale/page the use sees).
Step 4 : Paste your Universal code (found below) on the checkout AND thank you pages of your funnel ABOVE the CF Pro HYROS code.
Step 5 : Once this is set up integrate with your payment processor and Paypal in your integration area HERE.
Ask your onboarding rep! We more than likely integrate and have not made the set up documentation for the system yet!